Today I’m hosting my first ever guest blogger! I’d like to welcome Helen from AboutANail.blogspot.com, whose blog is full of her amazing nail art projects and today she’s sharing a couple of these with you. She’s got plenty of great tips, so I hope you enjoy!
Hi, I’m Helen from AboutANail.blogspot.com. My blog mainly focuses on nail art that I have created myself using patterns that interest me or events like holidays and birthdays, so I thought I would share a couple of nail art tutorials for designs that I have previously done on my blog. I have chosen a simple tutorial and also one that’s a little harder! The only tools you will need for both are nail varnishes in various colours and a tooth pick!
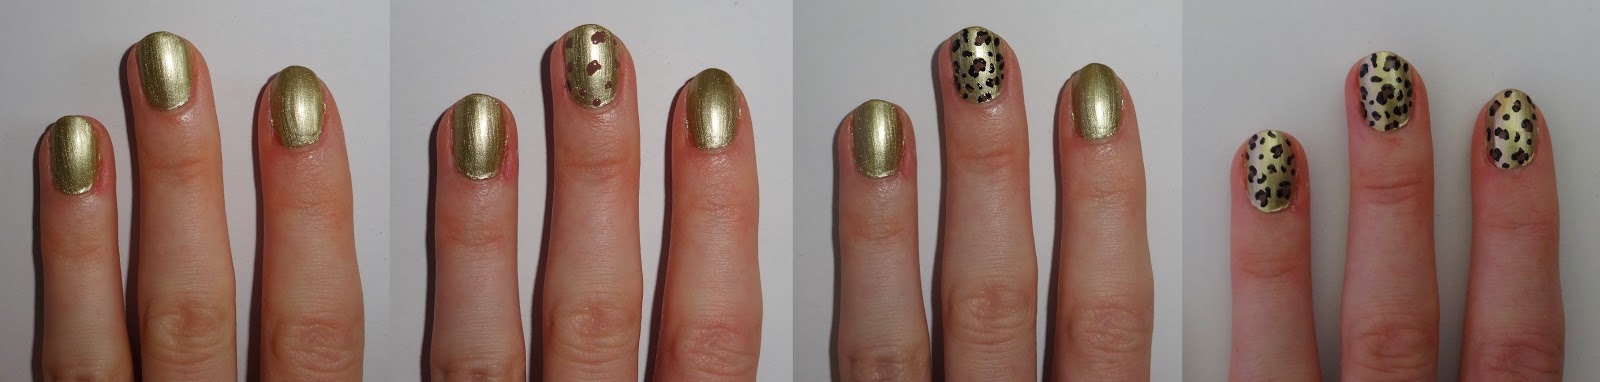
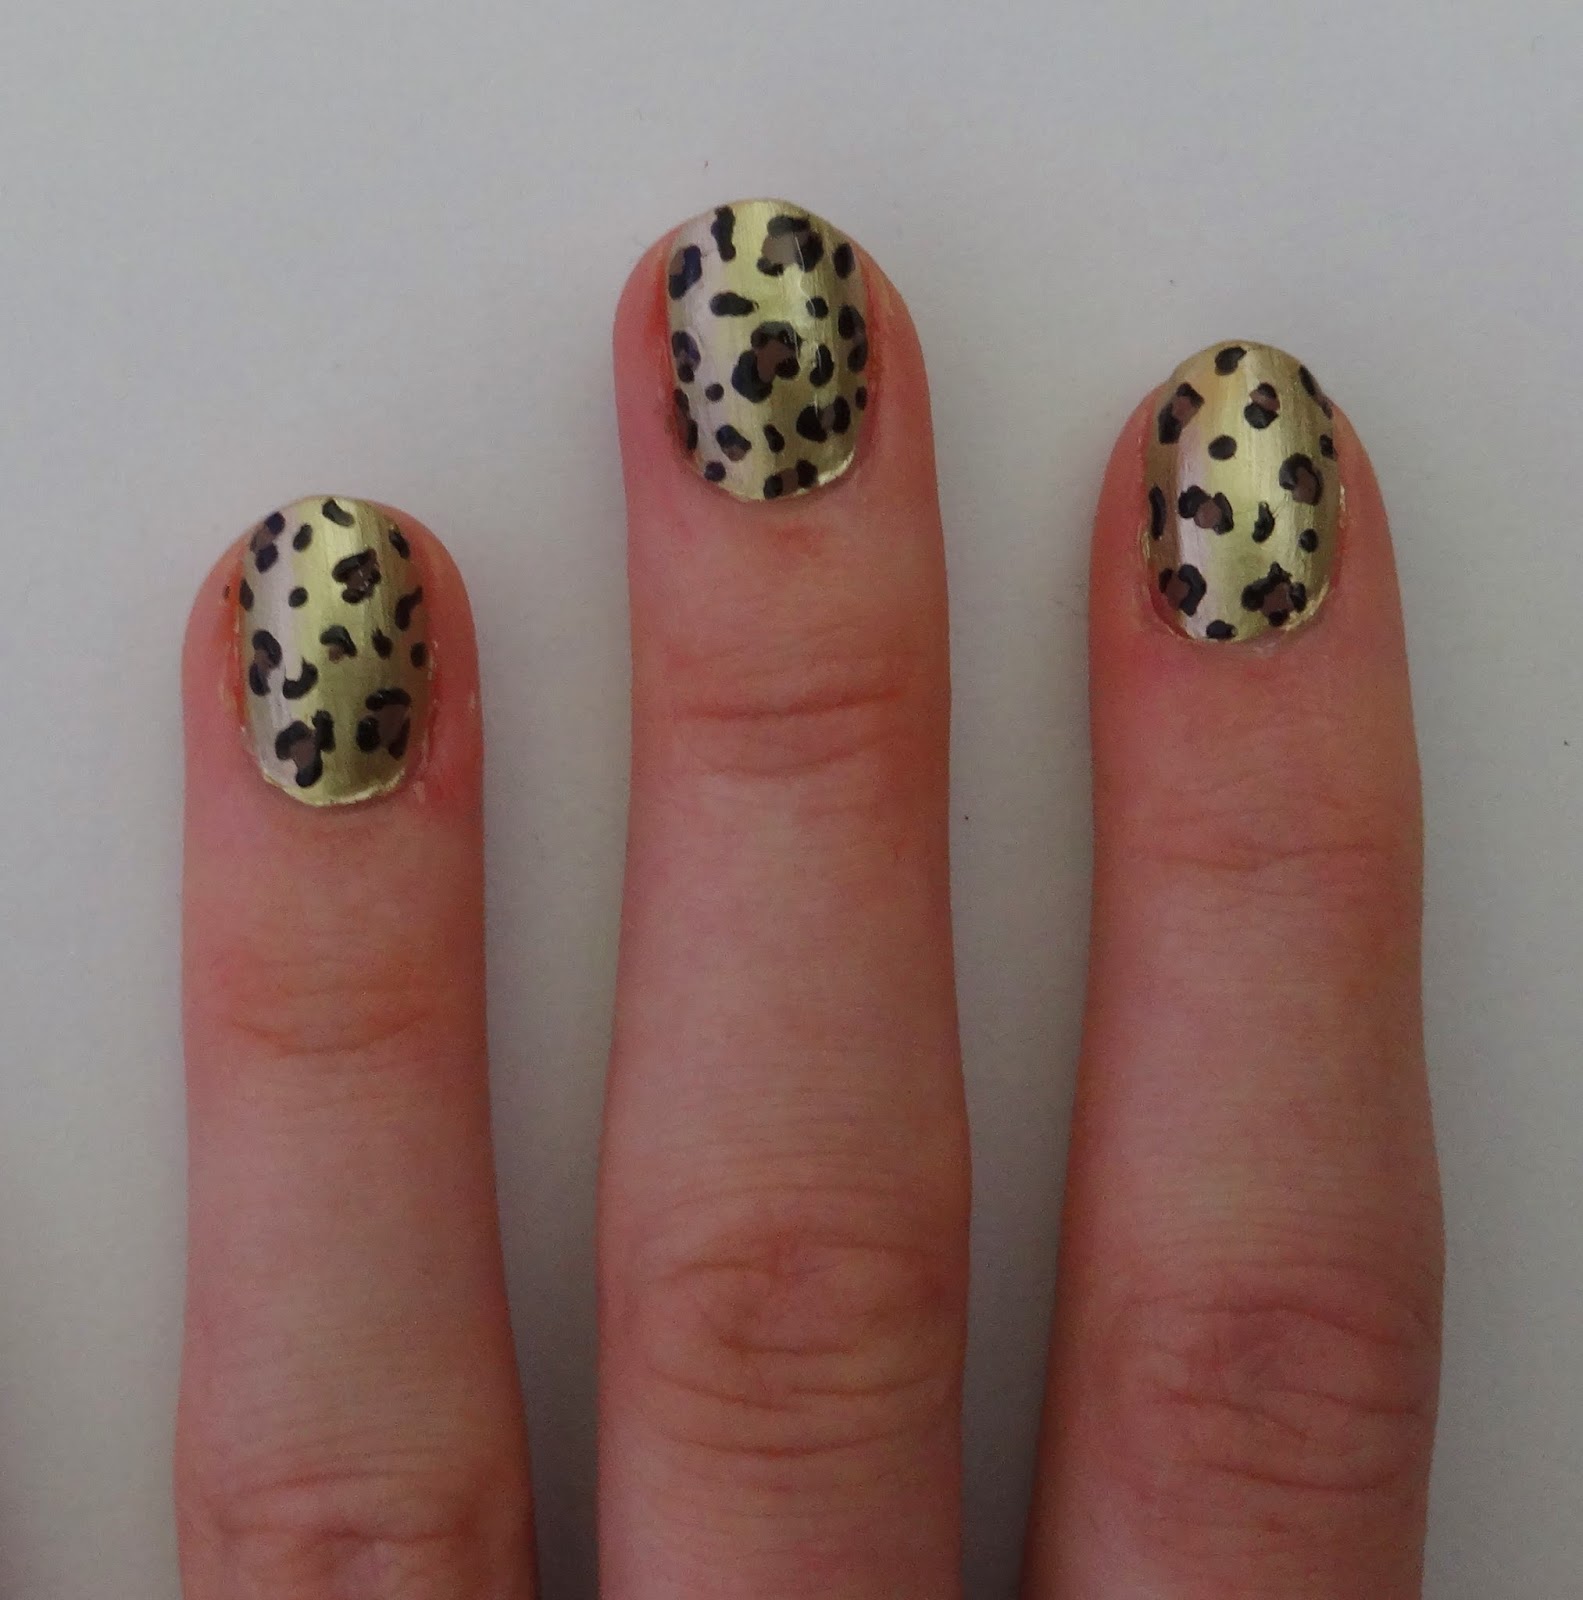
Easy nail art tutorial – Leopard Print.
I have used:
- Ciate underwear (Clear base coat)
- Barry M Foil effect (Gold)
- Barry M Mushroom (Brown)
- Barry M Black
- Ciate speed coat (Clear top coat)
- Tooth Pick
- So I started with a clear base coat, which helps protect the nail and prevents the nail varnish staining the colour of the nail.
- Then I applied two layers of the gold polish to get a good solid base colour. (It is better to do 2 thinner layers of base coat rather than a single thick layer.)
- Next I used the brown polish to make ‘spots’ on the nail. To do this I dabbed some of the brown polish onto something disposable and lightly dipped my tooth pick into it, then using more of a dabbing rather than stroking motion applied it to the nail. (A stroking motion can end up almost mixing colours from your base to the colour applied). You may need to ‘fill up’ the dots of polish you made on the disposable thing, it can dry fairly quickly. Do not worry if your spots look a little messy, I find it makes the pattern come out better in the end anyway! Do not add too many spots or your nail can quickly become over loaded!
- Next is the slightly more intricate part (especially when doing it on your other hand, which just takes time and patience). Using the black in the same way as the brown (adding a dot of it to something disposable and dipping your tooth pick into it) trace wobbly lines partially around the brown dots. I also added black dots and squiggles in the more open spaces. Remember to regularly wipe excess polish off the end of the tooth pick.
- Finally, after letting everything dry fully, I added a final clear coat which glossed over the design and bought it together getting rid of any lumps to help protect the design for longer. I also ‘capped’ the edge of the nail to help make the design last. You do this by running the clear coat along the free edge of the nail, this prevents moisture getting under and chipping the design.
- I repeated on the rest of my nails and my nails were complete!
What I like about this design is that it doesn’t have to be perfect. You can put the spots wherever and in whatever shape and colours you like in! And it looks great however you chose to wear it!
Harder nail art tutorial – Flowers
I have used:
- Ciate underwear (clear base coat)
- Barry M Satsuma (reddy orange colour)
- Barry M Blueberry (Light blue)
- Barry M Black
- Barry M Matt White
- Essie Matte About You (Matte top coat)
- Green Polish, (unknown brand)
- Tooth Pick

- I used a similar method to the previous design, again with dabbing motions.
- First I started with a clear base coat then 2 thin layers of the red colour.
- Next I made circular shapes in light blue and by mixing light blue with a little bit of black, also circular shapes in darker blue. These do not have to be perfectly circular as they are flowers, so can be a little messy
- Then using the white I made a lighter blue and made wobbly lines inside the circular shapes, and again added black to make darker blue and made a dot or shape in the centre of the flowers. Again this can be fairly messy.
- Next I made leaves around the edges of the flowers using the green
- I then added dots using the white. Try not to put too much polish onto the tooth pick and about every 2 or 3 dots wipe the tooth pick clean to help keep the dots a similar size and shape.
- Finally I added a layer of the matte top coat to bring the whole design together.
- Repeat, placing varying amounts of flowers in different places on me nails. And it’s done!

I hope you’ve enjoyed this guest post, and have an attempt at a tutorial! Feel free to check out the rest of my blog and let me know how you get on!
